Número de Mensagens : 491 Data de inscrição : 14/05/2008
Assunto: StarCraft Interface Design Sáb Nov 07, 2009 4:09 am
A really in-depth tutorial on how to create a nice StarCraft style wallpaper.
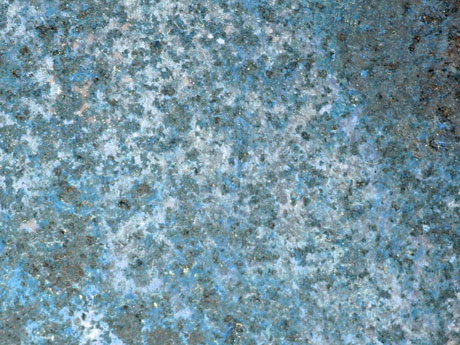
Download out of Internet the same texture we have below, that must have 1600×1200 px and 72 dpi.
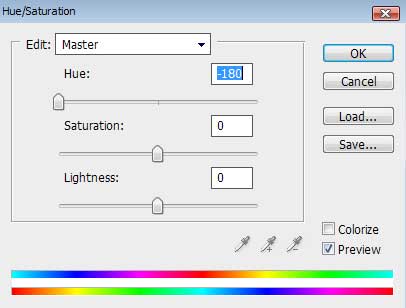
Press CTRL+U
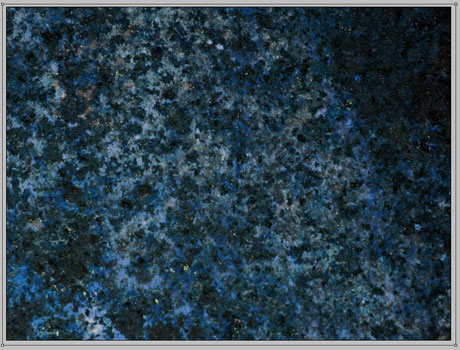
Next press this combination of buttons: CTRL+L
Its time to use the Rectangle Tool (U) to dark out the pictures edges:
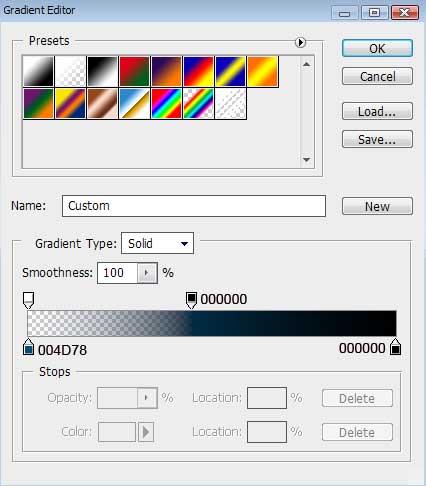
Set the next parameters for the last made layer by making a mouse click on the processed layer on the layers panel: Fill 0% Blending Options>Gradient Overlay
Gradients parameters:
Next step includes introducing the text on the central part of the picture, keeping the next demands for the inscription(font Stracraft you can find here):
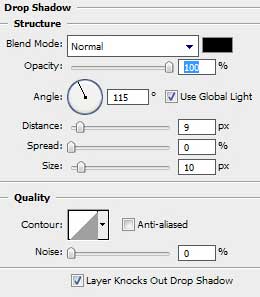
The layers parameters: Blending Options>Drop Shadow
Blending Options>Inner Shadow
Blending Options>Inner Glow
Blending Options>Bevel and Emboss
Blending Options>Bevel and Emboss (Contour)
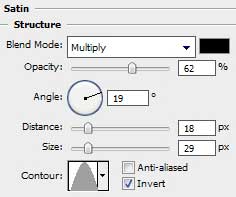
Blending Options>Satin
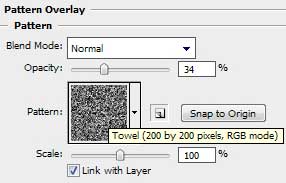
Blending Options>Pattern Overlay here we shall choose the pattern out of the set Texture Fill 2
Now we should insert the number 1 under the made inscription and then make a copy of the figures layer. Select after that Free Transform option to turn over the copy, placing the figures layers as it is demonstrated next image:
Apply the same parameters for both figures layers: Blending Options>Outer Glow
Blending Options>Inner Glow
Blending Options>Bevel and Emboss
Blending Options>Bevel and Emboss (Contour)
Blending Options>Satin
Blending Options>Pattern Overlay here we should choose the pattern out of the set Texture Fill 2